It is very easy to give permission of your Amazon seller account to an employee or a person who will manage your Amazon seller account on your behalf. Giving permission to someone else is a good practice because we all know when someone is running business they don’t have time to do every activity by his/her own.
However, you might want to provide access to the people who are involved in the management of your business. For example there are times when you want to add your working staff or co-partner to manage inventory and shipping confirmations. So for this you can use user permission feature to add new users and can also adjust user permissions.
One of the features of Amazon seller central is that it uses invitation model. So the admin can use this feature to give permission to other users. Steps that admin or the account manager should follow to invite users are:
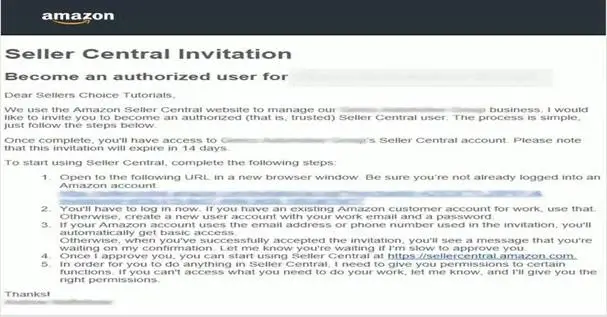
First, the admin has to send an email or the SMS to the users he/she wants to invite.
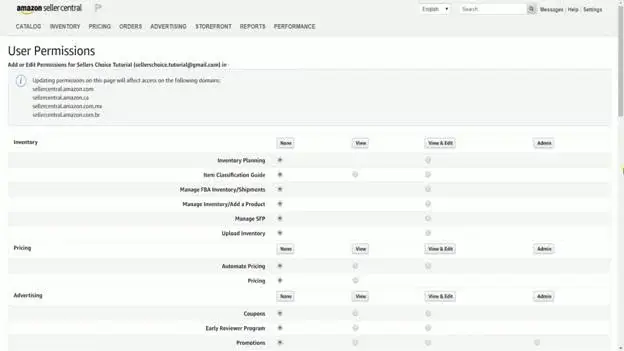
And secondly, the admin needs to figure out the permission for each user.
Steps To Give User Permissions on Amazon Seller Central:
1. Login to your Amazon seller central account.

2. Drag your mouse to the “settings” option located at the top right corner of the screen, a drop-down menu will appear. Select “user permissions”.

3. Type the name and the email address of the user you want to add to the seller central account and then click “send invitation”.

After you sent the invitation, then that particular user name is shown in the “open invitations” field. At the right side of this field there are 2 buttons: one for Resend and other for Delete. You can use these buttons if you want to resend or delete the invitation.

The invited user will get the invitation in just a few seconds. If the invited user doesn’t receive the invitation then he/she can check the invitation in either spam folder or in promotions folder

4. Once that user accepts the invitation then that user’s name is shown in the “current user” area.
5. Till then, you can manage the user’s access by clicking the “Manage Permissions” button.

By default, user doesn’t have any permission till you assign them one.

6. Once you are done with selecting the permissions that you wish to grant to that specific user, click on continue to save and confirm the permissions granted.

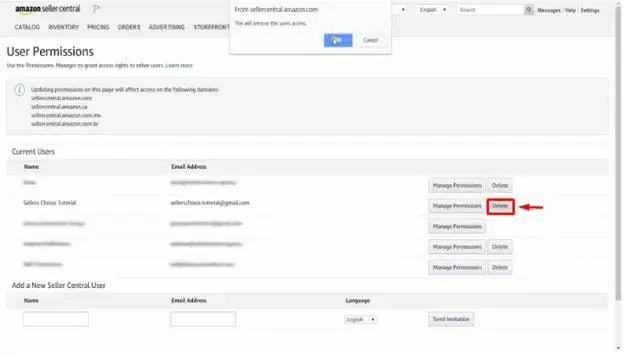
If you do not want a user to have an access to your account then just click on the delete button that is on the open invitation field and click “OK” to confirm.


